This help area is under development, with future edits and additions to come.
Welcome to our genealogy pages. This Help pages will give you a short overview of how to get around and get the most out of our site. It will hopefully give you the basic navigation tools needed to make your visit both enjoyable and informative without a lot of difficulty. Please keep in mind that this section is in no way a complete how-to guide. This genealogy database is reserved for the use of current GGFA members. If you find any errors or want to make suggestions, visit the “Make a Suggestion” tab below.
Many of us use one genealogical program or another and nearly all of them have a very graphical look to them. You can see your family group sheets, display charts, etc. This website is much the same except that, instead of it being on your computer, it is on the internet. This walk-through will introduce you to the primary functions of the site. Clicking on any of the arrows below opens an expanded discussion of the topic listed.
On the home page you will see links to the various sections of the site, REVISE , and a Search box on the right side of the page.
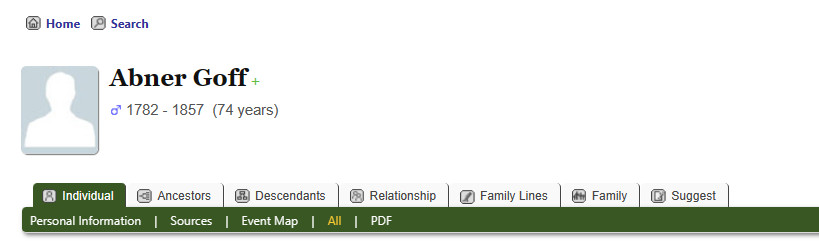
To begin, click on any link and you will notice that every page (like this one) contains a set of four icons directly under the page header. The function of each icon link is quite straightforward:
![]() Home – Takes you to the front page of the GGFA Genealogy database
Home – Takes you to the front page of the GGFA Genealogy database
![]() Search – Takes you to the Advanced Search screen (see below).
Search – Takes you to the Advanced Search screen (see below).
![]() Print – Prints the page you are on to your printer without all the menu items.
Print – Prints the page you are on to your printer without all the menu items.
![]() Logout/Login – Logout of your session or Log back in.
Logout/Login – Logout of your session or Log back in.
Some pages also have the ![]() Add Bookmark icon. This lets you keep a list of your favorite pages on this site.
Add Bookmark icon. This lets you keep a list of your favorite pages on this site.
In the search box (right side of home page), put “Goff” (without the quotes) in for the Last Name and “Abner” (without the quotes) in for First Name and press .
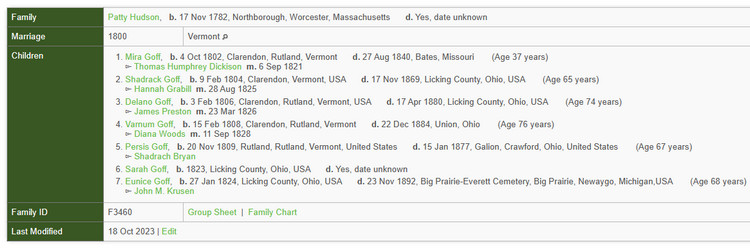
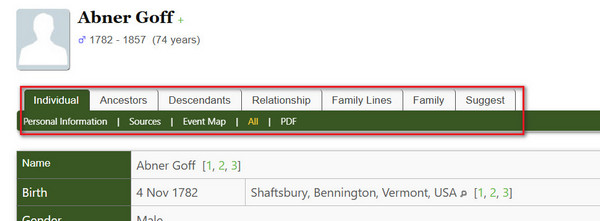
This will give you a list of the results that were found to match. On this list, click on the name of the Abner whose Person ID is “I1203” (Born 4 November 1782, Shaftsbury, Bennington, Vermont). You are now at his Individual Page, the header of which you see below.
Take a few minutes to orient yourself with the layout. This is the “core” display of the genealogy pages. The standard view shows all of the most pertinent ‘Personal Information’; the other views listed in the bar below the name limit information to a specific category. Note that the personal information is divided into three sections — the Personal Information for the individual selected, his/her parents, and his/her family, including spouse and children (if any).
In the Parents and Spouse/Partner sections of the page, if you hover the mouse pointer over the person’s parent’s or spouse’s name you get a pop-up window previewing that person’s parents, spouse and children; click on the name to go to that person’s page. To the right of the parent’s name there may be an ‘right-arrow’ () and a number, indicating the parent had more than one marriage:

Children are listed in the Spouse/Partner section. You can click on any highlighted name to view that individual.
An Event Map may be visible; click on ‘Load the map’ to display it if not. This shows the location of the main events in the life of the individual.
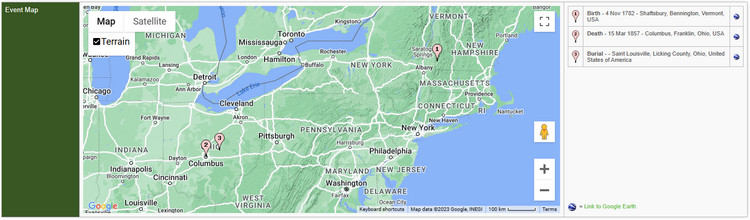
- Click the pin number on the map to get the description, date, and location of the event.
- If you have Google Earth installed on your computer, you can click on the any of the pins in the list of events on the right-hand side to view in the Google Earth.
- Use the icons in the lower right-hand corner of the map to zoom and adjust the map.
Look at the 5 tabs next to the “Individual” tab: Ancestors, Descendants, Relationship, Family Lines, Family, and Suggest.
NOTE: On the Individual, Ancestors and Descendants pages you have the option to create a report in ‘pdf’ format for the information you are viewing. To make use of this option you will need to have installed Adobe Reader in order to view the report.
An Event Map may be visible; click on ‘Load the map‘ to display it if not. This shows the location of the main events in the life of the individual.
- Click on the Event Number pin to open the map in a new window. If you are using FireFox, you can right click and open in a new tab rather than a new window. On the map in the separate window, you can get driving directions to or from this location.
- Click on the Google Earth icon to view using the Google Earth desktop application once you have downloaded and installed the application on your desktop.
- Use the + (plus) to zoom in on the map and the – (minus) to zoom out, or you can use the slider to control the zoom. If the Google Map server returns a message that no map is available at that zoom level, then you must zoom out in order to get the map to display.
- You can also click the Hybrid button to view the map as a satellite picture with names.
- Click the pin number on the map to get the description, date, and location of the event.
Click on ” Ancestors” and you will find a dynamic chart. The default view is Standard (4 generations). Clicking on any of the names on the chart will take you to the individual sheet for that person.
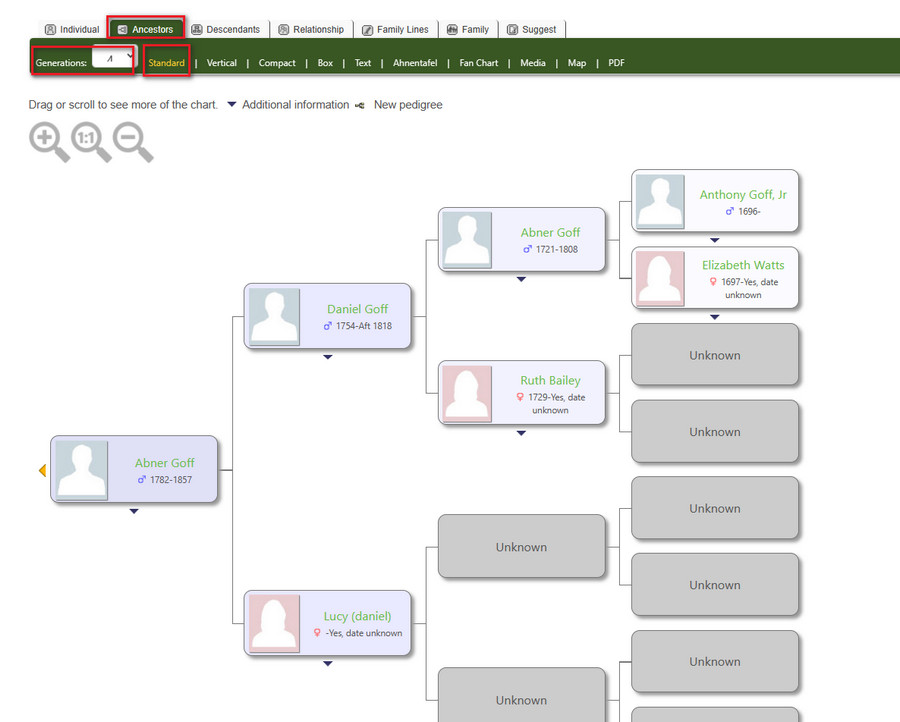
Notice that there are little arrows pointing down beneath many of the boxes. If you hover your mouse over the arrow (not click!) a drop-down list for that person will open. You can click on a name in that sheet to take you to their individual sheet. Clicking on any icon will show the next generation above (ancestors); clicking on the icon will show the ancestry starting from the next generation below. Wherever you see the pedigree icon , you clan click to show the ancestry from that individual. Also note that in the bar just above the chart, you can specify the number of generations you want to display (beware that the page will get increasingly wider and longer, requiring more scrolling, as you increase the number of generations).

In the dark green bar there are a number of other Ancestor chart views available by clicking on Vertical, Compact, Box, Text, Ahnentafel, Fan Chart, Media or Map. The latter displays both lines of parentage for any individual — and lists that person’s grand-parents, great-grandparents, and so on — as far back as is known, based on the number of generations selected for the display. The icon that may be shown alongside a name in the Media display means that at least one photo, history, or other media item exists for that individual. [Note: this feature is not currently enabled.] The Ahnentafel chart (also known as an ascendants table – See Wikipedia article on Ahnentafel for details.) lists all the generations in tabular form, complete with all children and birth, marriage, death, and burial details if known. For more information on the MAP function, check the Ancestor Map tab below. Try clicking on each of the Ancestor display options to see what they offer.
Ancestors Map – Selecting “Ancestors” on the Upper Bar and “Map” on the far right in the green bar below – will give you a map like the one displayed below. At the far left in the green bar, you will have the option to select the number of generations to include.
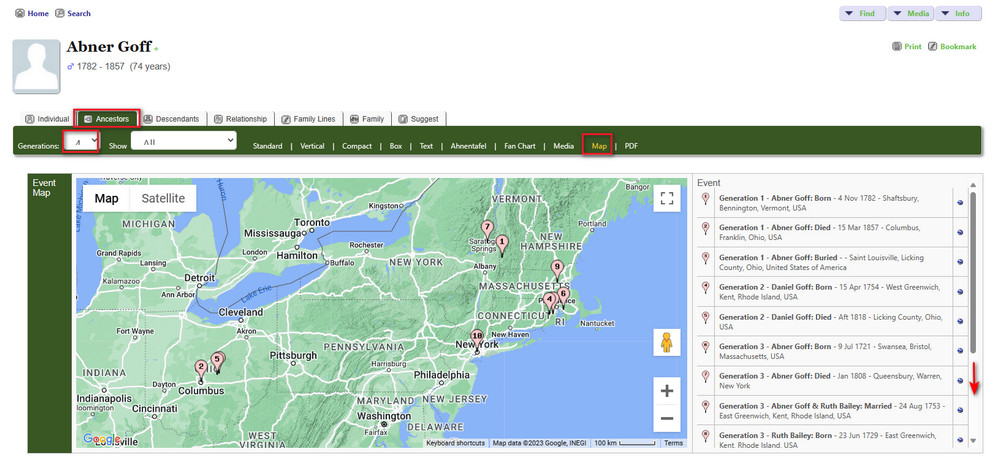
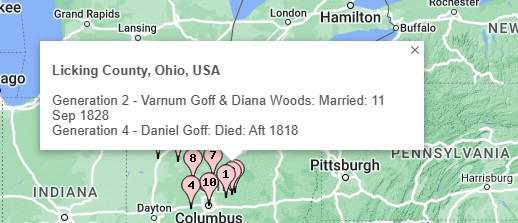
This map displays the location of key life events for a family line over the selected number of generations. Clicking on one of the pins will display the events for that location as seen below:
The “Descendants: tab gives you a listing of all descendants of this individual.
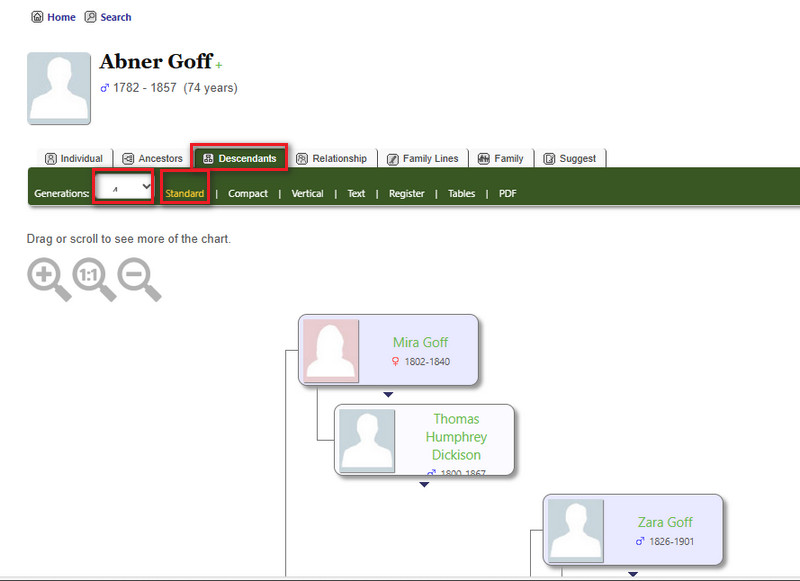
The default view is the “Standard” chart seen above. If you hover over any of the names on the chart, you will see more detailed information about their birth and death where available. Beneath you will see the spouse and to the right their children.
To the far left in the green bar you can select the number of generations to include in your chart. If you see an arrow to the right of a box with a family member, clicking on it will expand that family line.
Try clicking on the other types of Descendant charts, listed on the dark green bar: Compact, Vertical, Text and Register – a list of generations in tabular form, similar to an Ahnentafel..
For information about the Descendants – Tables option, please view that separate topic.
If you would like to know how many descendants by generation a member of our GGFA family has listed in our database, check out the Descendants Tables tab.

Select the option indicated and wait a few moments for the report to be prepared. The program searches our database of more than 40,000 Goff-Gough family members and finds all descendants of the selected individual. It then displays a report listing the number of generations, along with the number of descendants in each generation.

In the example above patriarch Anthony Goff and his wife Sarah Polley have 5,170 descendants in the GGFA database spanning 12 generations!
Notice in the left box, there is a column titled “Select”. The button in the row for the 2nd generation is selected. In the right table is a listing of the 13 children of Anthony and Sarah.
If you select another generation (in the example below, the 3rd), the report will prepare a table of all descendants in that generation, along with their birth and death dates (where known) and their parents.

Note that in TNG – a name highlighted in green indicates that it is a link to that individual’s home page. In the example above, if you click on William Goff, you will see his individual page with his family information.
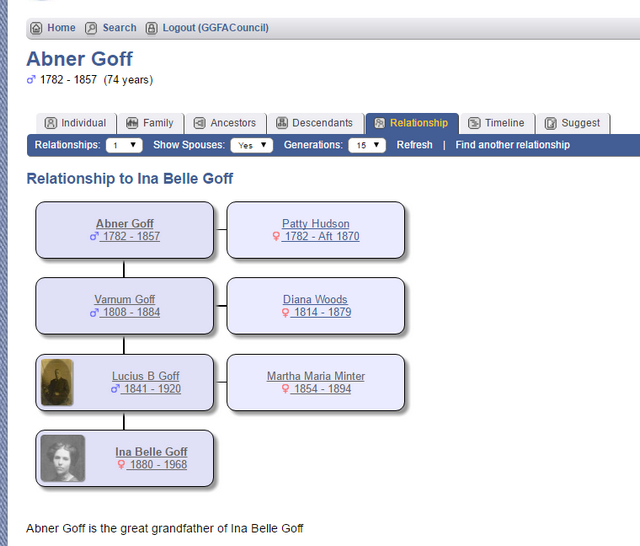
The “Relationships” tab enables you to generate a box chart to show the relationship between this individual and any other person in your tree.
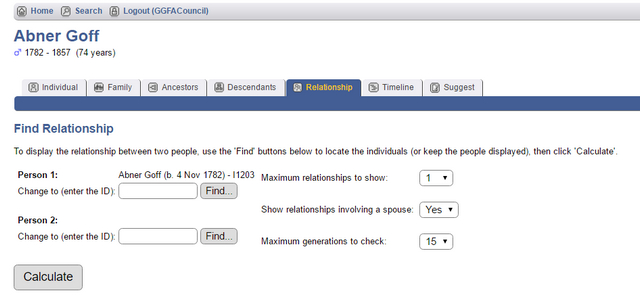
Just click on the “Find” button under “Person 2” and search for “Ina Goff” (remember, last name on top). Select ‘Ina Belle Goff’ (ID-I67) and click “Calculate” The relationship is described at the bottom of the chart.